Getting Started
💡 A minimal example App using 'simshady' can be found here.
Installation
Install the package using your preferred package manager:
npm install @openpv/simshady
Basic Usage
1. Initialize the Scene
Begin by creating a new ShadingScene object:
import ShadingScene from '@openpv/simshady';
const scene = new ShadingScene();
2. Add Geometries
Add one or more simulation geometries — such as buildings or PV panels — using addSimulationGeometry. Add shading geometries using addShadingGeometry:
scene.addShadingGeometry(someShadingGeometry);
scene.addSimulationGeometry(someSimulationGeometry);
In Figure 1, the difference between the two types of geometries is shown. The simulation geometry, represented by the colored building, is the main focus where PV yield is calculated. The shading geometries, shown in grey-brown, are included in the simulation to account for shading effects due to their close proximity.
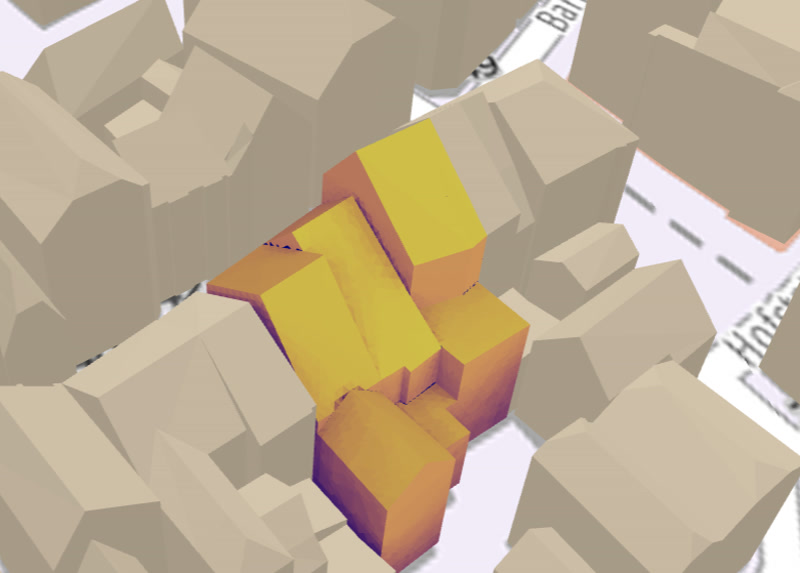
Figure 1: Screenshot from openpv.de showing both simulation geometries (colored) and shading geometries (grey-brown).
These geometries need to be Three.js Buffer Geometries. You can use a variety of Three.js Loaders to load different 3D file formats into BufferGeometries. For example input files see building.obj or geometry.json in our test folder.
3. Add Solar Irradiance Data
Include irradiance data in the required format via addSolarIrradiance. This data should contain time series for both direct and diffuse irradiance. See irradiance_munich_2018.json for an example:
scene.addSolarIrradiance(someSolarIrradianceData);
4. Run the Simulation
Call the calculate method to perform the simulation. It returns a Three.js Mesh, which can be used directly in a Three.js scene:
let mesh = await scene.calculate({
solarToElectricityConversionEfficiency: 0.15,
});
showThreeJS(mesh);
💡 You can see simshady in action at openpv.de.